When it comes to physical training just because you can do something doesn’t mean you should. For instance, I could decide to go and start sprinting up a hill as fast as I could with no warm up. Perhaps my body would cope with it, but the more likely scenario is that it wouldn’t. A far smarter idea would be to begin with some running technique work, if I had no running base. Once that was grooved in place I could do some easy tempo runs gradually building the pace. Only after a few months of building up would it be smart to move onto the hill sprints, and only then once a thorough warm up had been undertaken.
Often in the gym people forget that there are exercises that go before exercises – progressions, or regressions, depending on how you look at it. Two of the most fundamental yet poorly done exercises are the humble squat and push up. Both require you to maintain good trunk alignment while producing force with the extremities. These skills flow into other more complex athletic activities like running, jumping, punching, and throwing. But I’ll guarantee that if you can’t do a squat or push up well you’ll have little chance of doing any more difficult task well so it pays to get the basics right.
How to build the squat:
The first, and most important part of building the squat is the very base layer. That base layer is the requisite mobility to squat well without load. If you can’t achieve a good squat position unloaded you have some issues. And if you can achieve a good position, but need 50kg to push you into position first, you may have more issues.
The three key areas of mobility for the squat are the ankles, hips, and thoracic spine. I like to use a two-part system to free things up of static stretching followed by mobilising the area. For the ankles combine a static calf stretch for 60-120 seconds per leg with ankle mobility work for 10 – 20 reps.
For the hips it’s not as simple as you need to work on multiple muscles to free up their range. Here’s the list:
Hip flexors – kneeling hip flexor stretch for 60 – 120s followed by cook hip lifts for 5 – 10 reps.
Glutes – pigeon stretch for 60 – 120s followed by the active pigeon drill for 10 reps. (https://www.youtube.com/watch?v=pJHbhMNBjxI)
Adductors – frog stretch series by my friend Jon Engum.
The next step is the thoracic spine. For best results lie across a foam roller so that it sits at the bottom border of your shoulder blades.
Follow that up with face the wall squats.
Now that base mobility should have been gained you can move onto actual squatting. But now comes the next problem – where to start? There are so many possibilities from body weight to loaded using a variety of implements.
The first step should always be to assess raw movement unloaded. That means we begin with body weight squats. Our goal here should be three sets of 20 reps with good form. Good form constitutes:
- Heels stay on the floor throughout the entire movement.
- Knees track toes.
- Knees don’t collapse inwards.
- Hip crease travels below the knee at bottom of squat.
- Lower back doesn’t curve and pelvis doesn’t tuck under.
- Upper back remains upright, not hunched.
- Hips rise at the same speed as the shoulders.
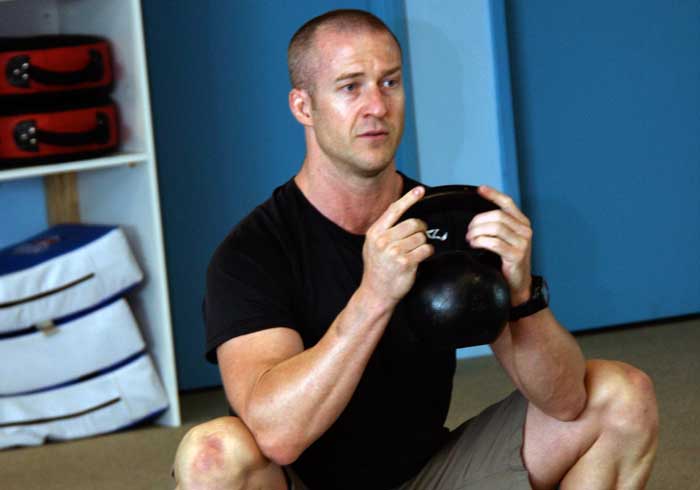
The next step is to add some load. The best way forward is the goblet squat based on the yoga garland pose, which relied on prying the knees open with the elbows to help achieve a solid base position. Holding a kettlebell at chest height squat to the same depth as with the body weight squats.
One of the cool things about the goblet squat is that the slight weight does two things for you. Firstly, it shifts the centre of gravity slightly forward, which gives you the feeling of having your heels raised, making a good squat easier for people to achieve. Secondly, the weight is trying to collapse you forward and your abs need to work hard prevent that flexion. In corrective exercise terminology the kettlebell is giving you core assistance by forcing your abs to engage so the hips can be free to do their thing. (And if you book this workshop I’ll be sharing a special way to do this exercise to amplify this even more).
Our goal with goblet squats is three sets of 10 performed to the same standard as the body weight squats. Suggested loads for males is a 24kg bell, and for females a 16kg bell.
Next up is even more load and we progress to double kettlebell front squats. While the addition of the load obviously adds more stress to the legs it also forces the core to engage even more. Once we progress to the use of the barbell this will become important as trunk stiffness will be the key to preventing the back injuries that are all too common in squatting (as the abs act to control the rotation of the pelvis).
Our goal now is five sets of five with the same standards as for the bodyweight squats. Goal weight is double 24kg bells for men and 16kg for women.
Now we can move onto the barbell and front squats. The reason to put front squats before back squats is that the bar in front of the body position forces that core engagement and teaches the body to do it automatically. That skill will be needed when the transition is made to back squats as it is easy to switch off everything once the bar is loaded on the spine and just have your skeleton support its load instead of maximising the protection you get from your musculature.
Five sets of three with your bodyweight loaded on the bar are the goal. Form should still look identical to your unloaded bodyweight squats.
The final step is barbell back squats where the loading is only limited by how much time and effort you put in. But by the time you have gotten to here you may have found a few things out and realised that you don’t actually need to use back squats as you’re “strong enough” for your sport or hobby. At RPT we don’t even use back squats with our clients as we don’t need to, and I have yet to see anyone perform the front squats technically well enough at bodyweight to satisfy my standards.
But the base of all of this is the mobility work at the very start and the unloaded bodyweight squats. Spend your time there before worrying about all the loaded steps and you’ll likely find new found performance once you progress.