The kettlebell swing can be a fantastic exercise when done correctly. It can be used to increase vertical jump, improve muscular endurance, and even to help fix bad backs. But the way I see most people doing them isn’t going to do any of that. The only real benefit from the way I see most kettlebell swings done will be your to your physiotherapist’s bank account.
The two-hand swing is the first version of the swing you learn and often the one people return to most simply for its convenience. But there are two other versions of the swing that should get used far more – the one-hand swing and the double swing.
The Problem With Using Two Hands
For starters, and this opinion is never popular, kettlebells are not designed to be used with two hands. I am well aware there are many exercises you can do with two hands with kettlebells that are great, but these are all patterning exercises for more advanced variations to come later on in your training.
Take the goblet squat as an example. The goblet squat was invented by necessity to quickly teach a room of high school kids the correct mechanics of squatting without needing to give an hour-long lecture on the subject. It is a patterning exercise.
Having said that, you still need to pattern this exercise correctly to receive maximum benefit. Here’s a proven four-step plan to have you swinging well quickly.
1 Wall Touch
- Stand with your feet shoulder width apart facing away from a wall. Make sure you are about half the length of your thigh away from the wall.
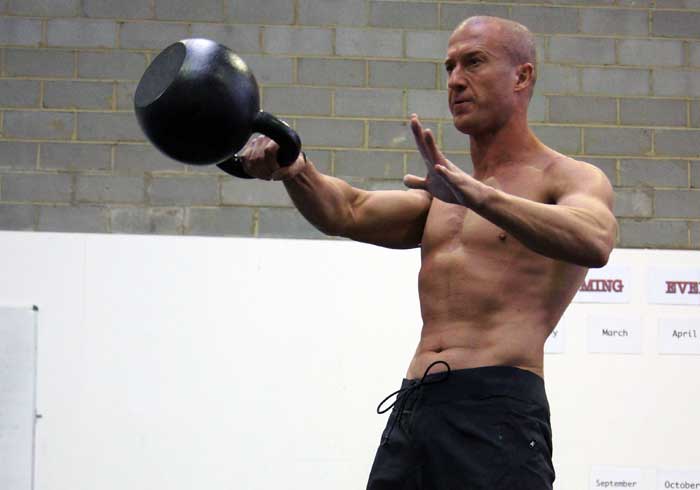
- Take the blades of your hands – the part you’d karate chop someone with – and place them on the creases in your groin where your underpants sit.
- Push back your hips with the blades of your hands until your butt touches the wall.
- Now, this next bit is important – do not put any weight on the wall. Your butt should touch the wall but all the weight should be on your feet – not leaning against the wall.
- Perform ten reps of this wall touch.
- Once you can do that, edge your feet away from the wall by about the length of your big toe and repeat the drill. You’ll notice you probably need to bend your knees a little to actually touch the wall – that’s okay. But make sure the first body part that bends is your hips and not your knees.
- Perform another ten reps.
- Edge away from the wall a bit more – probably about half the length of your big toe by now and repeat. You’ll have to really work hard to push back from the hips and not squat into it. Hips bend first, knees bend incidentally but they do bend. The hips need to travel down and back – do not make the common error of just bending at the waist.
2 Deadlift
The next step is to add a kettlebell, but perform this same action slowly. We used to say on the racetrack, “If you can’t do it slow, you’ll never do it fast.” It applies here, too. You need to be able to keep that same hips-down-and-back position and maintain a flat back while you deadlift.
- Stand with feet shoulder width apart again and place the kettlebell between your feet with the handle running across you and in line with the knuckles of your big toes.
- Do the exact same thing you did with the wall touch, reaching down and back with the hips until you get to the kettlebell. Don’t just bend over and reach for it. Make the movement at the hips get you to the point where your hands can grab the kettlebell handle.
- When you take hold of the kettlebell, you need to take the slack out of your body. To do this hold the kettlebell and pull yourself slightly towards it, deliberately trying to shorten the space between the joints and compress yourself.
- Reverse the motion making sure to stand tall at the top. Shoulders should be down and back, making a big chest (as if you are proud to be working with kettlebells, and you should be). Tense the glutes firmly, imagine drawing up the kneecaps to the groin while simultaneously pushing down into the ground as hard as you can through the feet.
3 Dead Swing
Now it’s time to get things swinging. But only a little to begin with. While the deadlift teaches you the mechanics of the swing it also creates in a way a false position, as you will never need to go that low when swinging.
- For the dead swing, set up like for the deadlift except the kettlebell will be just in front of you – about the length of one of your feet away.
- Once you have lowered yourself to the bell, positioning the hips down and back, grab hold of the kettlebell and again take the slack out of your body.
- Now simply hike the bell back hard – force plate analysis of the swing shows far more force should be generated on the backswing than on the upswing so don’t be shy. Make sure to keep the alignment of the body and not crumple as the weight of the bell pulls you back.
- Perform a single swing and return the bell to its starting position.
- Perform ten single reps.
4 Continuous Swings
The only thing you need to do now is to continue swinging instead of stopping after each rep. You will find that sets of ten to twenty reps are about right. Anything more will likely lead to poor form and maybe a sore back.
Time to stop patterning and train
However, we use the two-hand swing to initially teach the swing, but one-hand and double swings are far more beneficial in the long term. Don’t make the rookie error of predominantly performing two-hand swings for the rest of your life when there are better variations to use.
While the two-hand swing teaches us how to brace and create midline stability in the sagittal plane, the one-hand swing adds an anti-rotation component. Meaning, we are effectively killing more birds with the same cannonball with a handle than if we do two-hand swings. If training time is short, you’re better off getting more done in a single exercise.
Not only that but the one-hand swing allows us to work the grip harder, which in turn means we need to stabilize the shoulder more. In the FMS system, the one-hand swing is the final proof of a stable shoulder due to this grip-stability relationship that is derived from packing the shoulder properly.
And when we add in the control of rotary forces, what we have is an exercise that covers other FMS domains, such as the active straight leg raise (as the swing in any form is the final proof of that being adequate), shoulder mobility, the trunk stability push up, and rotary stability. Because these four elements make up the fundamental patterns in the FMS test, we know if we address these, or at least prove our ability to do them, then we will be able to do a host of other athletic movements, too. In other words, if you can perform a one-hand swing well you are likely able to perform many other more complex tasks well too.
A Simple Progression for One-Hand Swings
For many people, the toughest part of learning the one-arm swing won’t be the swing action itself. That should have been adequately covered in all the initial pattering work you did with the two-hand swing. Instead, the thing they’re going to most struggle with is learning to pack and control the shoulder properly.
1. Side Planks
In this position, we are unloaded and close to lying – our most basic posture for learning patterns. All the work is done by learning to keep the shoulder stable and linking that through the rest of the body to prevent the body sagging to the ground.
2. Kettlebell row from bilateral stance
Hinge at the waist to get into the correct posture for rowing. Where side planks work shoulder stability with a compression strategy the one-hand swing requires stabilising with a distraction strategy. For that we need a pulling motion.
Hold the kettlebell in one hand. Pack the shoulder and focus on pulling the elbow as far back as possible while keeping the shoulder packed at all times. Unlike a regular rowing exercise we’re not doing this to build the back but to reinforce shoulder packing on the working arm. The purpose here is not to smoke the arms and back with rows, but to make sure the trunk stays braced and the shoulder packed.
3. Suitcase Deadlifts
We use the deadlift to teach the two-hand swing because the deadlift is done at a much slower pace and it allows you to really feel what you should be doing without the stress of the high speed of the swing. So why aren’t we using the suitcase deadlift to teach the one-arm swing for the same reason?
When doing this movement, focus on drawing the shoulder blade into the opposite hip corner and shortening the body by contracting down the obliques. The key to this movement is that body shouldn’t tip sideways or lose posture in any way. If it does, then either the weight is too heavy to learn with or you need to regress a step until better control is possible.
4. One-Hand Swing
Keep all the things worked on up until this point consistent – the hinge taught in the two-hand swing, neutral spine, full hip extension at the top of the swing, breathing, and the shoulder packing learned during the three preceding steps. Do all those pieces and your one-hand swing will be great.